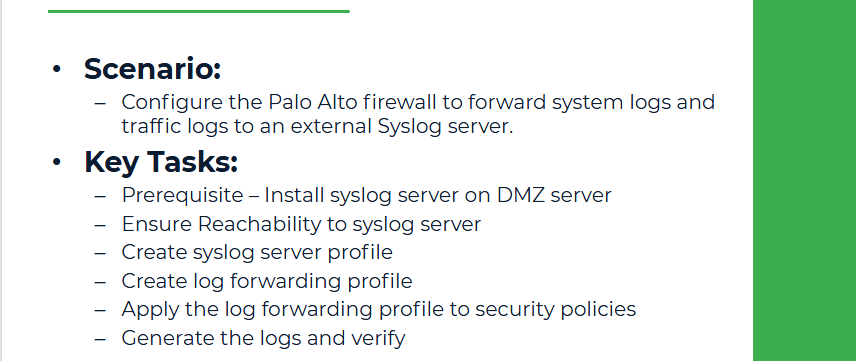
Objective
In this lab, we will configure the Palo Alto firewall to forward system logs and traffic logs to an external Syslog server. This is a common requirement in enterprise environments for centralized logging, security auditing, and monitoring.
We’ll assume that a Syslog server (such as a Linux server with Syslog-ng or rsyslog) is running in the DMZ zone.
Why This Lab?
Logging to an external server ensures that logs are retained even if the firewall is rebooted or compromised. It also enables better reporting and integration with SIEM tools, such as Splunk, ELK Stack, or SolarWinds.
Lab Topology Reference:
| Device | IP Address | Zone |
|---|---|---|
| PA Firewall - DMZ Interface | 192.168.2.1 | DMZ |
| Syslog Server (DMZ Server) | 192.168.2.10 | DMZ |
Prerequisite: Prepare DMZ Server as Syslog
1. Install syslog on DMZ Server
sudo apt update
sudo apt install rsyslog -y
sudo systemctl status rsyslog...
2. Edit the main configuration file:
sudo nano /etc/rsyslog.conf
Uncomment or add the following lines to enable TCP and UDP syslog reception:
module(load="imudp")
input(type="imudp" port="514")
module(load="imtcp")
input(type="imtcp" port="514")
Restart Syslog server
sudo systemctl restart rsyslog
To store logs from a specific device IP in a separate file, add this to a custom .conf file:
if ($fromhost-ip == '192.168.1.10') then /var/log/192.168.1.10.log
& stop
sudo systemctl restart rsyslog.
Step 1: Ensure Reachability to Syslog Server ( DMZ Server)
Before configuration, make sure the Palo Alto firewall can ping the Syslog server (DMZ Server):
ping source 192.168.2.1 host 192.168.2.10
If ping is successful, you’re good to proceed. Note: Use CTL+c to stop ping
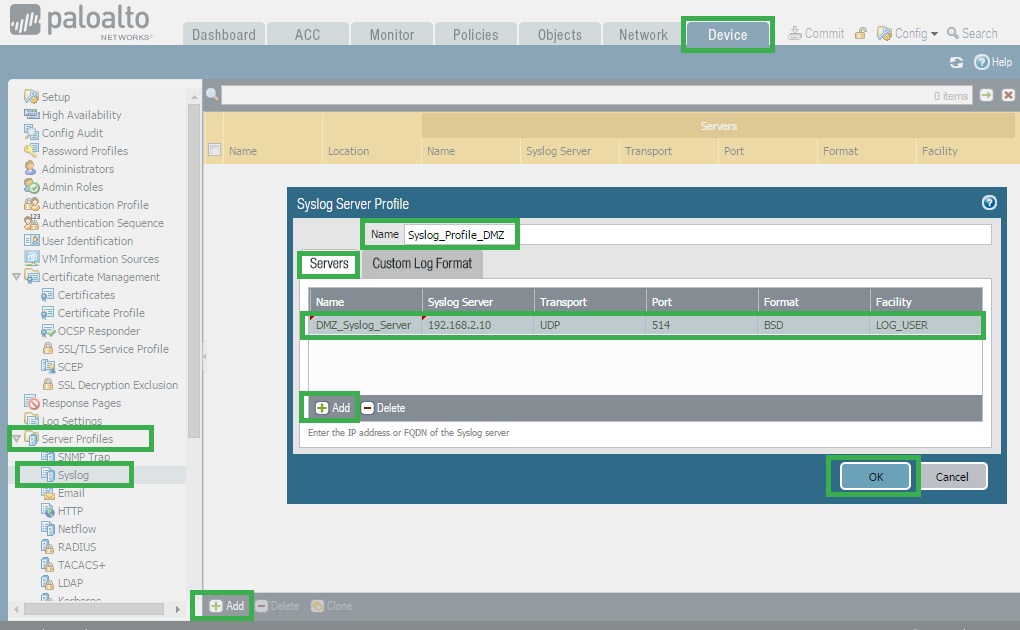
Step 2: Create a Syslog Server Profile
1. Go to Device > Server Profiles > Syslog
2. Click Add
3. Name: Syslog_Profile_DMZ
4. Under Servers, click Add
● Name: DMZ_Syslog_Server
● Syslog Server: 192.168.2.10
● Transport: UDP
● Port: 514 (default Syslog port)
● Facility: LOG_USER (you can leave it as default)
5. Click OK, then OK again to save the profile.
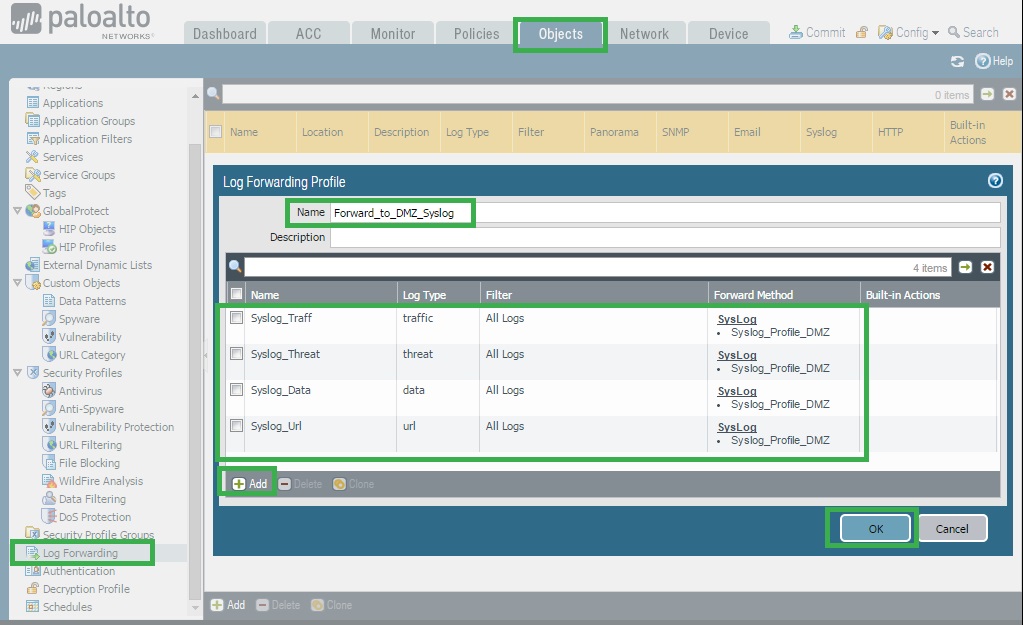
Step 3: Create a Log Forwarding Profile
1. Navigate to: Objects > Log Forwarding > Add
2. Name: Forward_to_DMZ_Syslog
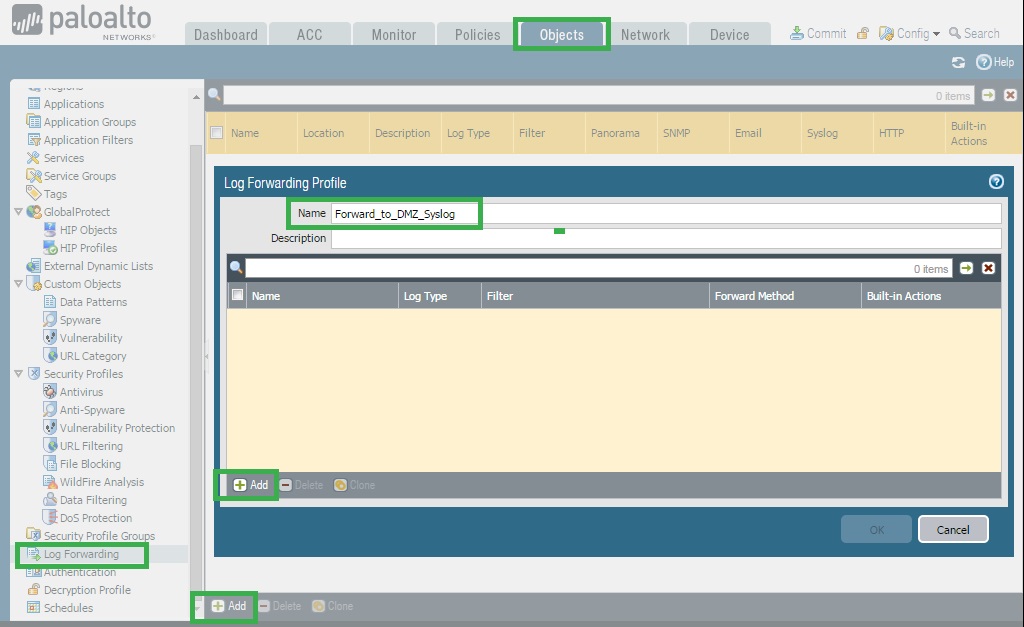
3. Under Log Types, click Add
● Name: Syslog_Traff
● Log Type: Traffic
● Enable check: Syslog
● Select Syslog Profile: Syslog_Profile_DMZ
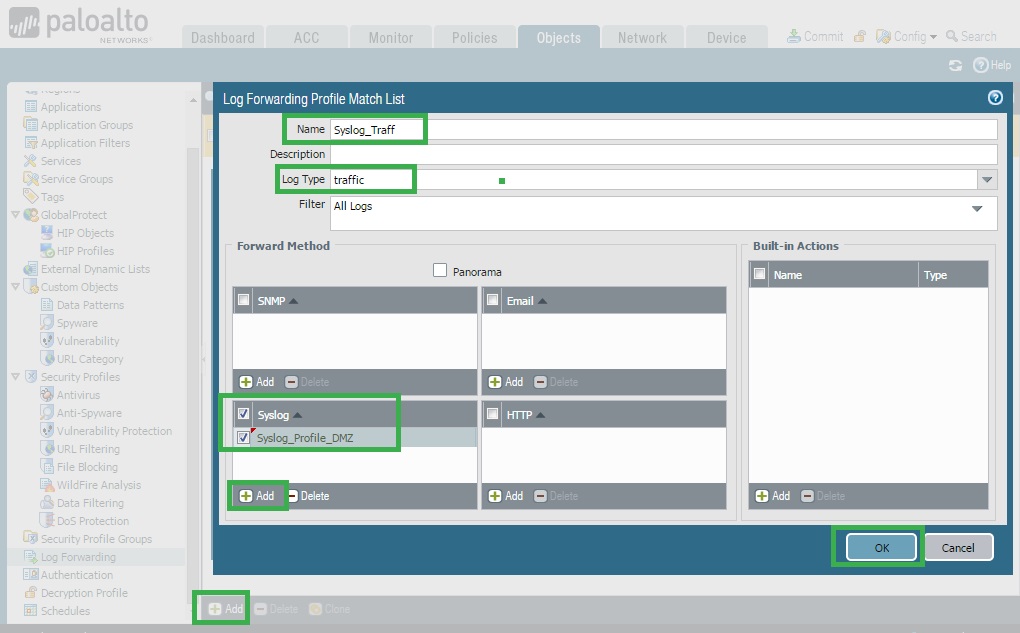
4. Repeat the same steps to add and Name anything appropriately:
Log Type: Threat
Log Type: Data
Log Type: URL
This ensures various types of logs are forwarded.
5. Click OK
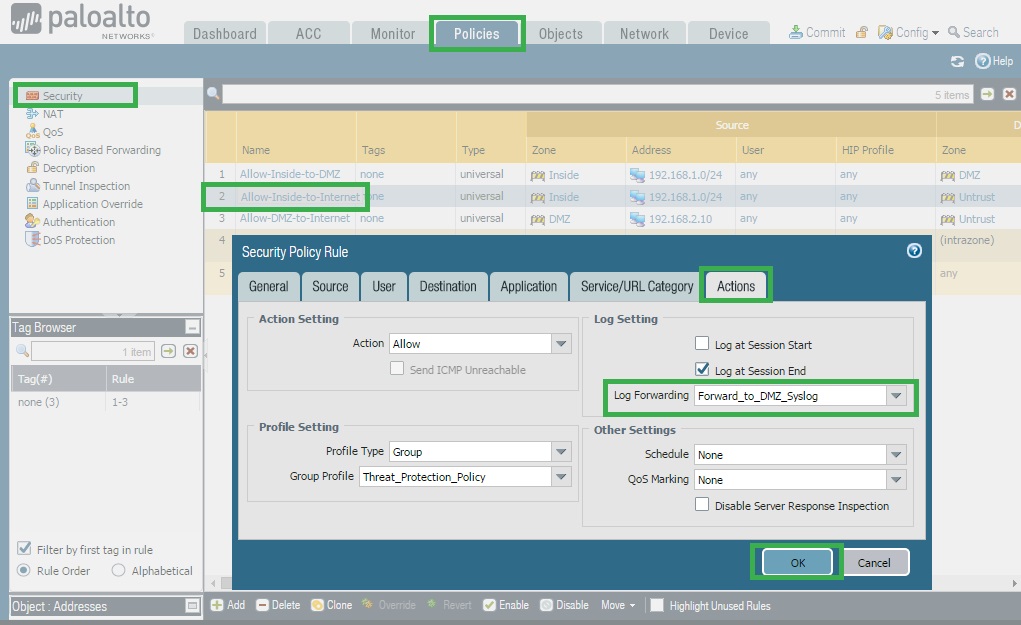
Step 4: Apply the Log Forwarding Profile to Security Policies
1. Go to: Policies > Security
2. Edit the rule Allow-Inside-to-Internet
3. Under the Actions tab, go to Log Forwarding and select:
Log Forwarding Profile: Forward_to_DMZ_Syslog
4. Click OK and commit the configuration.
Step 5: Generate Logs and Verify at the Syslog Server
On Inside-PC, open a web browser and access some websites (e.g., www.google.com, www.facebook.com)
On your Syslog server (DMZ Server), check the log file:
tail -f /var/log/syslog
tail -f /var/log/192.168.1.10.log
You should start seeing traffic logs generated by the Palo Alto firewall.