Lab Objective
Access the Palo Alto firewalls via console connection, assign management IP addresses, configure basic system settings, and establish management connectivity through the Win-Workstation.
Section 1: Physical Access and Initial Login
Task 1.1: Connect to PaloAlto1 Console
The Palo Alto VM firewalls are in factory default state with no IP configuration on any interface. The only way to access them initially is through the console connection.
1. Establish Console Connection to PaloAlto1
● Start PaloAlto1 device and click on it, the console will open in next browser tab
● Press Enter to activate the console
Note: Please wait for 5-10 minutes to initialize the Palo Alto device before login
2. Initial Login
● At the login prompt, enter: admin
● At the password prompt, enter: admin
● The system will display a warning about the default password and prompt you to change it
3. Change Default Password
Enter old password: admin
Enter new password: Uninets@123 (or your preferred complex password)
Confirm new password: Uninets@123
The system will confirm the password change and present the CLI prompt: admin@PA-VM>
4. Verify Factory Default State
show system info | match "hostname"
show system info | match "model"
show system info | match "sw-version"
This will display the current hostname (should be PA-VM), model, and PAN-OS version.
Task 1.2: Connect to PaloAlto2 Console
Repeat the same process for the second firewall.
1. Establish Console Connection to PaloAlto2
● Start PaloAlto2 device and click on it, the console will open in next browser tab
● Press Enter to activate the console
● Login with admin/admin and change the password
2. Change Password on PaloAlto2
Enter old password: admin
Enter new password: Uninets@123 (use the same password for consistency)
Confirm new password: Uninets@123
Section 2: Configure Management Interface IP Addresses
Task 2.1: Configure PaloAlto1 Management Interface
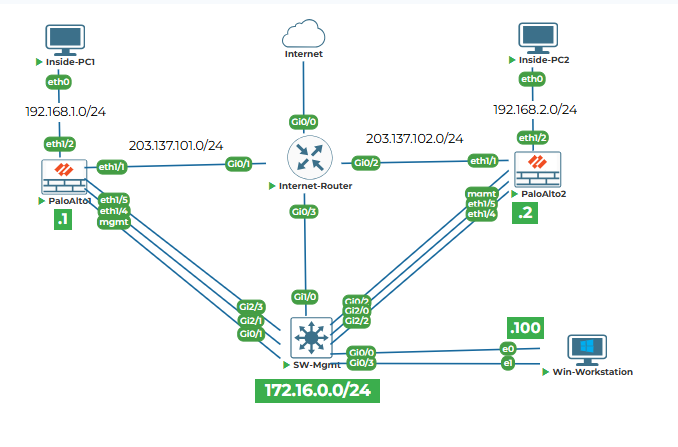
The management interface needs to be configured with the IP address 172.16.0.1/24 as specified in the topology. This will allow access from Win-Workstation (172.16.0.100) through the SW-Mgmt switch.
1. Enter Configuration Mode
configure
The prompt changes to admin@PA-VM# indicating you are in configuration mode.
2. Set Management Interface Static IP Address, Netmask, and Default Gateway
set deviceconfig system type static
set deviceconfig system ip-address 172.16.0.1 netmask 255.255.255.0 default-gateway 172.16.0.254
Note: The default gateway is set to 172.16.0.254, which is not present in the topology but is required for the management interface configuration syntax. In reality, traffic from the management interface will be switched through SW-Mgmt and reach Win-Workstation directly without needing a gateway.
3. Configure DNS Servers
set deviceconfig system dns-setting servers primary 8.8.8.8
set deviceconfig system dns-setting servers secondary 4.2.2.2
4. Set Hostname
set deviceconfig system hostname PaloAlto1
5. Configure Management Interface Settings
set deviceconfig system update-server https://updates.paloaltonetworks.com
6. Commit the Configuration
commit
exit
The system will validate the configuration and apply it. You will see a confirmation message: Configuration committed successfully
7. Verify Management Interface Configuration
show interface management
This will display the management interface status and IP address.
Task 2.2: Configure PaloAlto2 Management Interface
Repeat the configuration process for the second firewall.
1. Enter Configuration Mode on PaloAlto2
configure
2. Set Management Interface Static IP Address, Netmask, and Default Gateway
set deviceconfig system type static
set deviceconfig system ip-address 172.16.0.2 netmask 255.255.255.0 default-gateway 172.16.0.254
3. Configure DNS Servers
set deviceconfig system dns-setting servers primary 8.8.8.8
set deviceconfig system dns-setting servers secondary 4.2.2.2
4. Set Hostname
set deviceconfig system hostname PaloAlto2
5. Commit the Configuration
commit
6. Verify Management Interface Configuration
show interface management
Section 3: Verify Management Connectivity from Win-Workstation
Task 3.1: Test Basic IP Connectivity
Win-Workstation has two network interfaces:
● eth0: 172.16.0.100/24 connected to SW-Mgmt Gi0/0 (VLAN 172)
● eth1: 203.137.103.100/24 connected to SW-Mgmt Gi0/3 (VLAN 203) with gateway 203.137.103.254
1. Check Win-Workstation IP Configuration
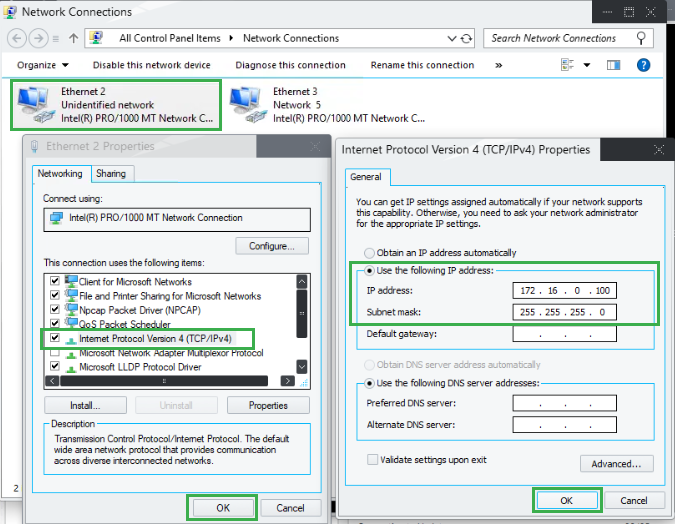
● Configure eth0 (Ethernet2) for IP 172.16.0.100/24
Go to Control Panel > Network and Internet > Network Connections, right click on Ethernet2 and select Properties
Double click on TCP/IPv4 and enter IP as 172.16.0.100 and subnet mask as 255.255.255.0. Cick OK to continue.
● Open Command Prompt on Win-Workstation as Administrator
● Run:
ipconfig /all
● Verify eth0 (Ethernet2) has IP 172.16.0.100/24
● Verify eth1 (Ethernet3) has IP 203.137.103.100/24 with default gateway 203.137.103.254
2. Ping PaloAlto1 Management Interface
ping 172.16.0.1
Expected result: Successful replies. If ping fails, check:
● SW-Mgmt port Gi0/0 is in access VLAN 172
● SW-Mgmt port Gi0/1 is in access VLAN 172
● No firewall on Win-Workstation blocking ICMP
3. Ping PaloAlto2 Management Interface
ping 172.16.0.2
Expected result: Successful replies. Verify SW-Mgmt port Gi0/2 is in access VLAN 172.
Task 3.2: Access Web Interface
1. Launch Web Browser on Win-Workstation
● Open Google Chrome or Mozilla Firefox
2. Access PaloAlto1 Web Interface
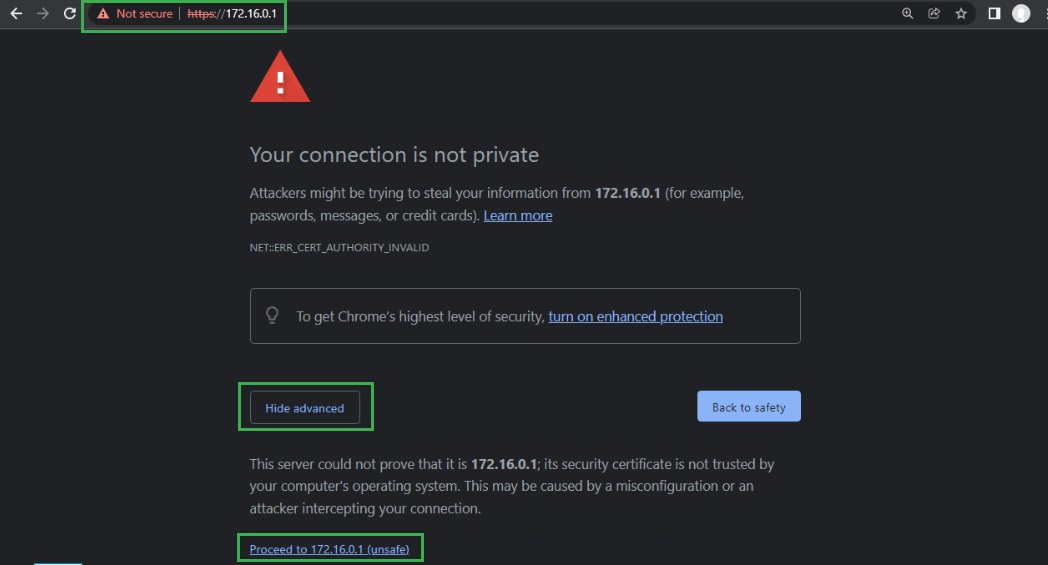
● Navigate to: https://172.16.0.1
● Accept the self-signed certificate warning (this is expected for factory default devices)
● Login with username: admin and the password you set during console configuration
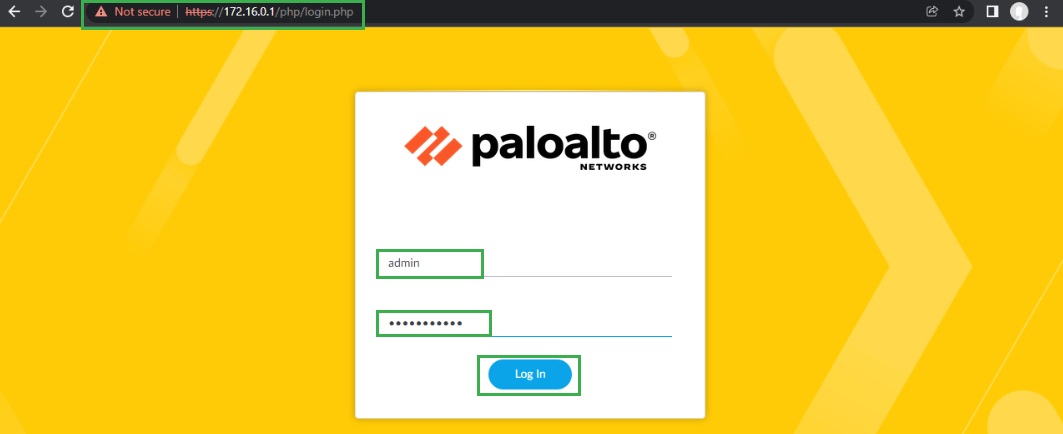
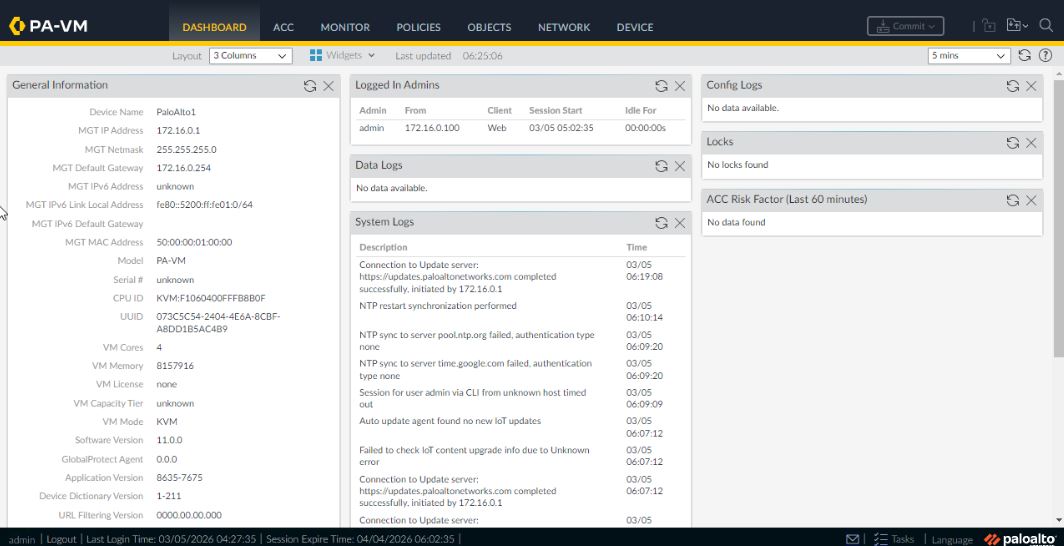
● The dashboard will load showing system information
3. Access PaloAlto2 Web Interface
● Open a new tab and navigate to: https://172.16.0.2
● Login with the same credentials
● Verify the dashboard loads successfully
Task 3.3: Explore Web Interface
1. Navigate Through Tabs
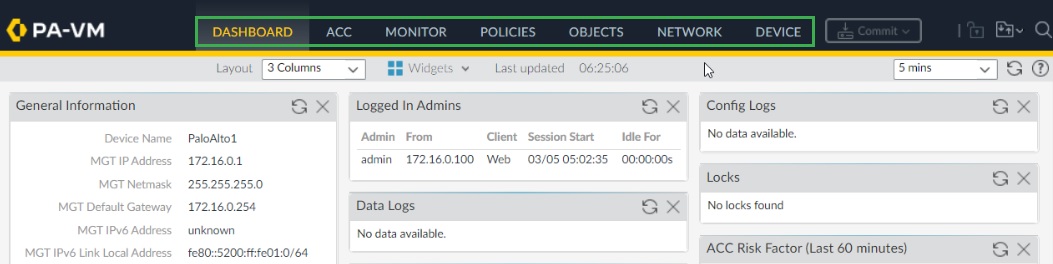
● Dashboard: View system summary, licenses, alarms
● ACC (Application Command Center): View application usage (currently empty)
● Monitor: Check logs (currently no traffic)
● Policies: Verify no security policies exist
● Objects: Check address objects (none configured)
● Network: Verify interfaces are all unconfigured except management
2. Check License Status
● Navigate to Device > Licenses
Section 4: Basic System Hardening
Task 4.1: Configure NTP Servers
Accurate time is critical for logging and certificate validation.
1. On PaloAlto1
text
configure
set deviceconfig system ntp-servers primary-ntp-server ntp-server-address pool.ntp.org
set deviceconfig system ntp-servers secondary-ntp-server ntp-server-address time.google.com
commit
2. On PaloAlto2
text
configure
set deviceconfig system ntp-servers primary-ntp-server ntp-server-address pool.ntp.org
set deviceconfig system ntp-servers secondary-ntp-server ntp-server-address time.google.com
commit
3. Verify NTP Synchronization
show ntp
Note: As of now NTP is not synchronized
