Objective
Check the preconfigured Internet router configuration
Assign IP addresses to all participating devices (PC, Server, and Workstation).
Set up the Fortinet firewall from scratch by configuring interfaces with IP addresses and enabling administrative access for the GUI and SSH.
IP Addressing Schema:
| Device | Interface | IP Address | Description |
|---|---|---|---|
| Fortinet | port1 | 192.168.100.1/24 | Untrust Zone (Internet Router) |
| Fortinet | port2 | 192.168.1.1/24 | Inside Zone (PC) |
| Fortinet | port3 | 192.168.2.1/24 | DMZ Zone (Server) |
| Fortinet | port5 | 192.168.10.1/24 | Management (Workstation) |
| Inside PC | Ethernet0 | 192.168.1.10/24 | Connected to Fortinet Port2 |
| DMZ Server | Ethernet0 | 192.168.2.10/24 | Connected to Fortinet Port3 |
| Workstation | Ethernet0 | 192.168.10.10/24 | Connected to Fortinet Port5 |
| Internet Router | GigaEthernet0/0 | 192.168.100.254/24 | Connected to Fortinet Port1 |
Step 1
Internet-Router is preconfigured, Interface Gi0/1 is receiving an IP via DHCP from Internet and NAT is enabled for traffic going from Gi0/0 (Inside) to Internet via Gi0/1 (Outside).
On Internet-Router:
!
enable
configure terminal
hostname Internet-Router
enable secret xxxxxxx
!
interface Gi0/0
description connected to fortinet port1
ip address 192.168.100.254 255.255.255.0
ip nat inside
no shutdown
interface Gi0/1
description connected to internet
ip address dhcp
ip nat outside
no shutdown
interface Gi0/2
description connected to workstation eth1
ip address 192.168.3.254 255.255.255.0
ip nat inside
no shutdown
!
access-list 1 permit 192.168.0.0 0.0.255.255
!
end
!
write memory
Step 2: Configure IP Addresses on PC, Workstations, and Server
1. On PC (Inside Zone)
Go to Control Panel > Network & Internet > Network Connections.
Right-click on your Ethernet adapter → Properties → IPv4.
Enter the following:
● IP: 192.168.1.10
● Subnet Mask: 255.255.255.0
● Default Gateway: 192.168.1.1 (which is the Fortinet firewall’s eth1/2 IP)
● DNS: 8.8.8.8 and 4.2.2.2
2. On Workstation (Management)
Go to Control Panel > Network & Internet > Network Connections.
Right-click on your Ethernet adapter → Properties → IPv4.
Enter the following:
● IP: 192.168.10.10
● Subnet Mask: 255.255.255.0
3. Server (DMZ Zone)
Login to server using username "uninets" and password "uninets@123". Edit file /etc/network/interfaces for changing the IP address.
sudo nano /etc/network/interface.
Write or edit the following content in the above file
auto ens3
iface ens3 inet static
address 192.168.2.10
netmask 255.255.255.0
gateway 192.168.2.1
Save the file using CTL+X then Y. You need to restart networking service using the command
sudo systemctl restart networking.service
OR
reboot
Once the server is rebooted, log in to the server again, then verify the IP address on the server
ifconfig
Step 3: Configuring Fortinet firewall interfaces and take GUI access.
1. Connect to Fortinet firewall via Console (Click on the powered ON device):
Login using default credentials:
● Username: admin
● Password: (leave blank)
Set the new password (enter it twice) and remember it (in our case, we are using username as "admin" and password as "admin")
2. Configure IP addresses on Interfaces:
Command:
!
config system global
set hostname HQ-FW
end
!
config system interface
edit port1
set mode static
set ip 192.168.100.1 255.255.255.0
set allowaccess ping
set allowaccess ping
set alias Untrust
set alias Untrust
set role wan
next
edit port2
set mode static
set ip 192.168.1.1 255.255.255.0
set allowaccess ping ssh
set alias Inside
set role lan
next
edit port3
set mode static
set ip 192.168.2.1 255.255.255.0
set allowaccess ping
set alias DMZ
next
edit port5
set mode static
set ip 192.168.10.1 255.255.255.0
set allowaccess ping https http ssh
set alias Management
end
!
4. Verify interface IPs from CLI:
get system interface physical
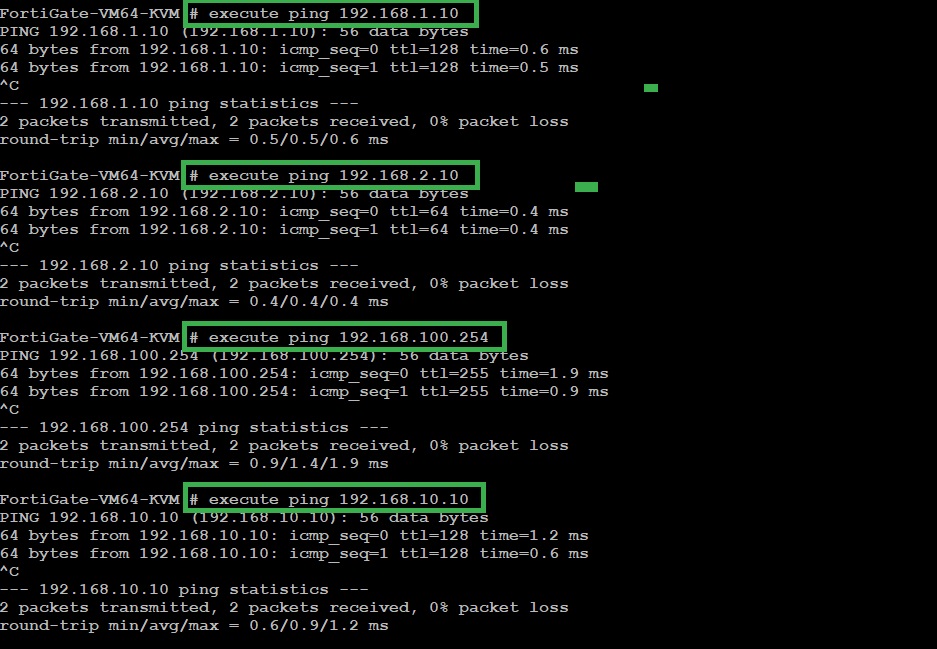
5. Ping Test from FortiGate CLI:\
execute ping 192.168.1.10 # Check connectivity to Inside PC execute ping 192.168.2.10 # Check connectivity to DMZ Server execute ping 192.168.100.254 # Check Internet Gateway execute ping 192.168.10.10 # Check Management Workstation |
execute ping 192.168.1.10
execute ping 192.168.2.10
execute ping 192.168.100.254
execute ping 192.168.10.10
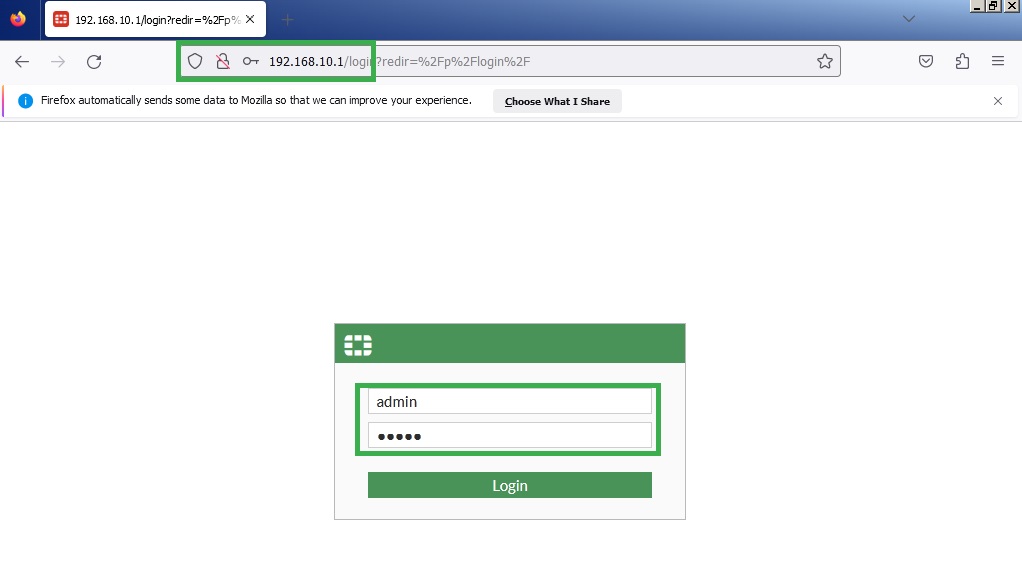
6. Access Fortinet via GUI:
Browse http://192.168.10.1 from the Management Workstation. In case Chrome is not working, then use the Firefox browser.
Log in using username and password as admin/admin (you set the password on FortiNet's first login via CLI)
In FortiGate setup, click on later. Also, click OK on the new features window to see the status on the Dashboard.
